| 9.2. Designer Introduction | ||
|---|---|---|
 | Chapter 9. Widgets and Designer |  |
| 9.2. Designer Introduction | ||
|---|---|---|
| | Chapter 9. Widgets and Designer | |
[ fromfile: designer-intro.xml id: designer-intro ]
Designer is a graphical program for composing and editing the GUI for an application. It has a drag-and-drop interface and a complete set of features that can save lots of programming time and effort. The output of a Designer session is an XML file named appname.ui , where appname is normally specified at the beginning of the Designer session.
In QtCreator, Designer has been included as an embedded "Design Mode" that is invoked automatically whenever a .ui file opens. Designer can also run as an embedded application inside other IDEs for which an appropriate Qt integration package exists (e.g., Eclipse, Microsoft Developer Studio, Xcode).
A classname.ui file can describe a Designer widget with children, layout, and internal connections.
The XML file is translated into a C++ header file, as explained in Section 9.7, but this section is about the use of Designer to compose a GUI.
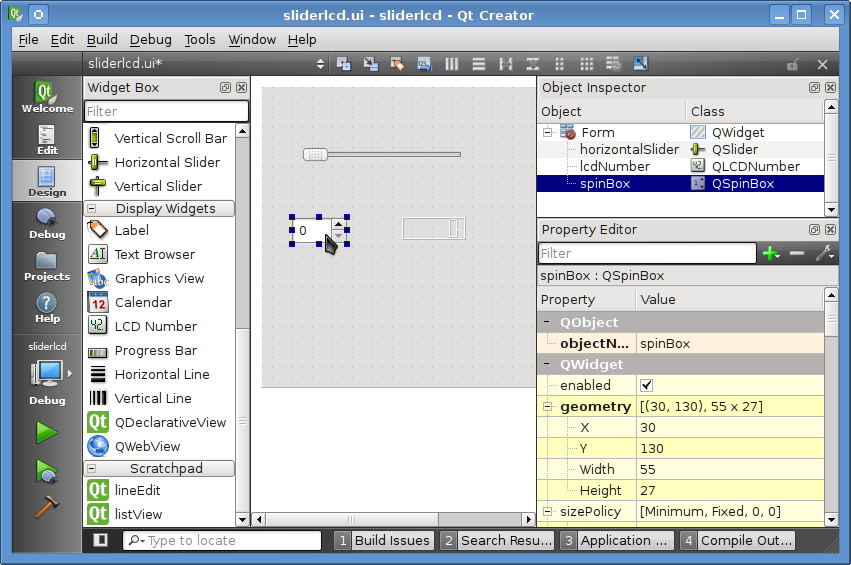
You can drag widgets from the Widget Box, into the central widget, the Widget Editor. After you have some widgets, you can select any of them in the Object Inspector and see its properties in the Property Editor, as shown in Figure 9.5.
In the Property Editor you can change any of the properties and that change will cause a corresponding change in the appname.ui file. If the property edit changes the visual appearance of the widget, you can see the change immediately in the Widget Editor.
When you drag widgets from the Widget Box to the Widget Editor, Designer gives them rather uninspired and uninformative names that you can change easily.
![[Note]](png/note-3.png) | Give Good Names to Your Widgets |
|---|---|
Most objects can be renamed from the Widget Editor or the Object Inspector, by either selecting the widget with a single left-click and then pressing F2, or by double-clicking on the widget. If you prefer, you can set the |
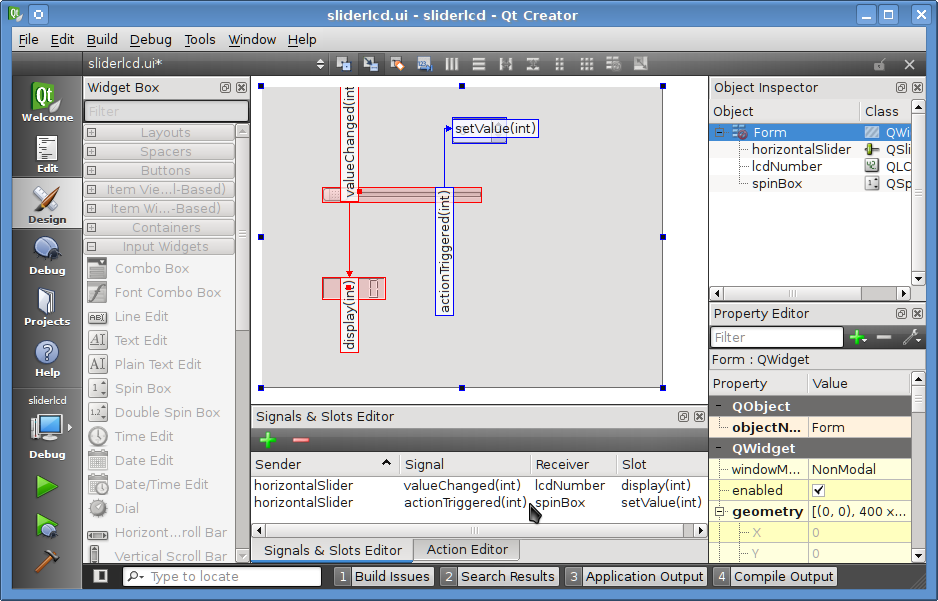
You can drag and drop connections between widgets by switching into the Signals & Slots Editor (F4), as shown in Figure 9.6. When you enter the Signals & Slots Editor, the Widget Box is disabled and you can drag a connection from the widget with a signal to the widget with a slot (in the Widget Editor).
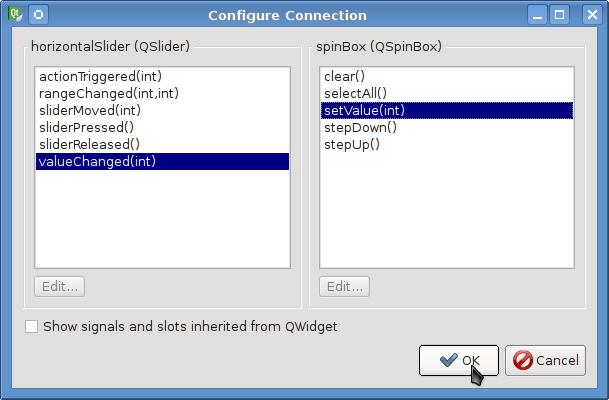
When you release the mouse button, a Configure Connection dialog pops up, as shown in Figure 9.7. It first shows a list of signals in the left panel and, when one is selected, the compatible slots display in the right panel. When you select a slot and click , the connection details immediately appear in the Signals & Slots Editor.
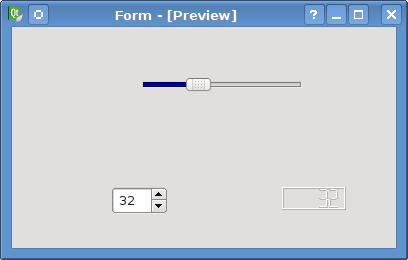
When you finish forming new connections, you can get back into Edit Widgets by pressing F3. You can always view or edit existing connections with the Signals & Slots Editor dockable (shown near the bottom of Figure 9.6) regardless of whether the widget editor is in widget editing mode, connection mode, or buddy editing mode. You can preview the dynamic behavior of the connections you just formed with Preview Widget (Ctrl+Alt+R), as shown in Figure 9.8
Even though no code at all has been written at this point, you can preview the dynamic behavior of your newly created ui file immediately with Designer. Section 9.7 describes how to integrate your ui file with your own (data handling) class.
| Generated: 2012-03-02 | © 2012 Alan Ezust and Paul Ezust. |
| |  | |
| 9.1. Widget Categories |  | 9.3. Dialogs |