A Recipe for a Tasty Interactive Game
People love to play games, which explains why clients keep asking us (the folks at Integrated Computer Solutions) to develop games for them to use at trade shows and conferences. We’ve built a wide variety of game types, including target games, races, puzzles, 3D immersion and competitive games. For this year’s Computer Electronics Show (CES) we whipped up a captivating package-delivery game for Indiegogo showcasing the products and services of its client Ingram Micro, which offers technology and supply chain services to businesses around the world. Here’s how we did it.
About the Game
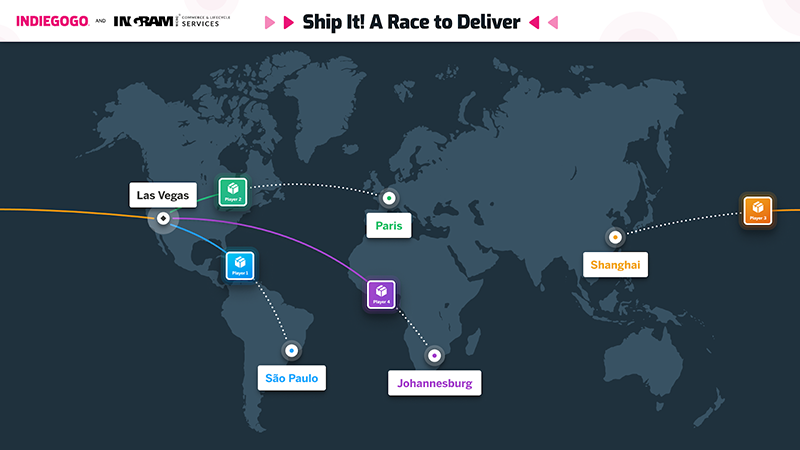
This race-style game pits two to four players against each other. Their mission is to deliver a package from one global city to another city by answering trivia questions. Players advance by answering quickly and correctly. To get started, contestants scan their conference badges on the controller tablets and confirm their name and email. The group is automatically assigned a destination city and a package to deliver. Then the game begins. After the players complete their delivery they are greeted with a “Thank You for Playing” prompt and asked if they would like to know more about Ingram Micro and/or meet with a representative. Here’s what the game looks like.

Here’s the basic recipe for the game we built. It can be easily adapted for whatever you’re cooking:
Software:
- 1 server
- 1 display application (for the giant map)
- 1 game play application (for interactive trivia challenges)
- 1 master controller application
Hardware:
- 5 tablets (Surface Pros)
- 1 Windows10 machine
- 1 65” display
- 1 router
Audience:
- 1 large, enthusiastic crowd
Cooking Instructions
Set oven to bake, 8 weeks total. Design for three weeks. While design is cooking, write code for a month and then let simmer with QA for a week. Pour into oversize touchscreen and serve while hot.
Here’s a closer look at what’s involved.

Server
The central part of the game, the server gathers and shares data and handles the interactions between all the game elements. The server is also responsible for management of the players, the questions, the travels and the scores. Therefore, it’s essential to break down the server into multiple components that have their own defined roles so you you don’t end up with an enormous chunk of code that will be impossible to maintain, or can’t be extend if needed.
For our game, we split the server into four parts:
-
The main process that handles all the connections and the interactivity between the different application thanks to Socket.IO. At the end of each game, the main process also saves locally the results and the users’ information.
-
A player manager that handles everything related to the player applications connected to the server, such as users’ information and scores. The player manager also ensures that there are no more than four player-applications connected thanks to a system of token represented by four nicknames. When a player application tries to connect the player manager gives an available nickname (i.e. a token). If no nicknames are available, the player application is kicked from the server. When a connected player application disconnects, it gives the nickname back to the player manager, which prevents a deadlock in an individual game.
-
A question manager that draws random questions from a list of over a hundred. The question manager also calculates the points earned by the users when answering a question, based on the time they took to answer and whether the answer is correct.
-
A travel manager that manages the trips users take to deliver their packages. For each game, the travel manager draws random trips from a list of options. While players start from the same location, each player is headed to a different destination city.
Our server is made in Node.js and we used a tool called pkg to package it into an executable file that makes installation easier since it can run on machines that don’t have Node.js installed.
World Map
The game map allows the audience to watch the action on a large screen while the players are focused on their controller tablet. The game map includes both a map of the world and the paths the player have to complete in order to deliver their packages. We used the GPS coordinates of city airports to ensure all the cities are placed accurately on the map.
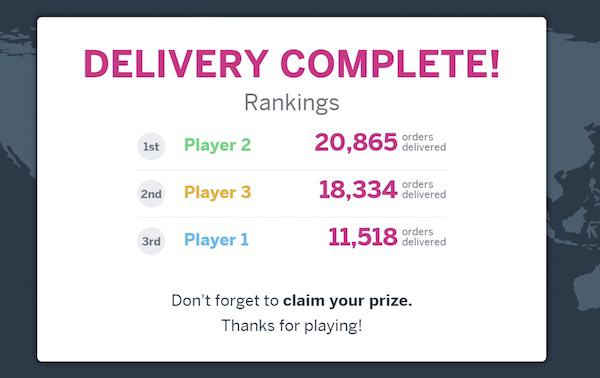
At the beginning of each game, the server sends to the map the starting city and the destination for each player. During the game the players move at a steady pace along their path to their destination. But receive a speed boost during a brief, specified time during game play for correct answers. The game ends as soon as the first player reaches his or her destination. At the end of a game, the server sends the scores and ranking of each player to the map, which displays them for the larger audience.
Tablets
React+Electron
Configuration file with the server address (IP+port)
Since the tablets used to actually control individual game play are running on Windows, we built the applications with React.js combined with Electron. This approach allowed us to compile them into a Windows application with an installer and to use a configuration file in which the address of the server is written. This way we don’t have to recompile the application when the server’s address change. But these applications can easily be built in React Native or Flutter.IO, which means they also can run on iPads or Android tablets.
Player application
Integration with conference service (lead API) + Qr code reader
The player application is quite complex because it needs to run on multiple tablets at the same time to play in real-time. We created six different states for the application so the server always knows where each player is. These states are:
-
Home: The application is on the home page
-
Lobby: The user is registering into the application
-
Ready: The application is ready to play to the next game
-
Playing: The application is playing a game
-
Waiting: When a game is running, the application is not part of the game
-
Finished: The application has finished playing the current game
Whenever a player application wants to change its state, the application asks the server whether the application can change its state. If necessary the server can order the application to go to a specific state like the playing and waiting states when a new game starts. Each player application has a different theme color associated with the nickname given by the server when the application initiates the connection — for instance, Player 1 with a blue theme, Player 2 with a green theme — so they are easy to differentiate. And we enhanced the overall user experience by including custom themes and a few interesting animations.
To play a game, the application uses the controller-tablet’s camera to scan the QR code printed on a player’s badge, and then sends a POST request to the lead API of the conference to fetch the user’s data. This way players don’t waste time filling a form on the application. (However, that functionality is enabled in case there are connectivity issues with the API).
At the beginning of each game, the server sends all the questions to the player applications and then the player applications display them to the user. He or she must answer the questions in a limited time. After each reply, the application sends the answer to the server and goes either to the next question or to the end screen, depending on the server's response.
MC application
The MC application is a relatively simple application with a login page to prevent unauthorized access. Once logged in, users can see all the player applications connected to the server and their current state. When at least two player applications are ready, a button to start a new game appears on the screen. During a game, there’s a STOP button displayed on the screen to halt game play. We also provided the MC application with some basic functions used to troubleshoot the game in the event of problems. From the MC application the game host can close and restart the server and all the player applications connected to it.

Summary
If you want to create an engaging interactive game, you’ll need:
-
A robust Windows machine to act as a server that handles all the data required by your game and ensures the communication between all the clients.
-
A player application with a well-oiled engine, and simple rules that can be assimilated quickly by the players.
-
A large video screen to catch the attention of the people who aren’t actually playing the game. In a trade show context, that’s all the foot traffic near your booth.
-
(Optional) An application for the MC to control the game. While the flow of your game can be automated, we recommend an MC because it adds a new dimension to game play. And, an MC can troubleshoot for players who might have difficulty registering in the player application.
-
Intriguing visual design and themes to make the game stand out and entice people to play.
And if you want to go the extra mile, consider adding a server discovery feature. Right now, the applications need a configuration file with the address of the server in order to connect. This means that when you set up your game at a trade show or event, you’ll need to retrieve the server address and edit these file. In the event you didn’t set assigned the server’s machine with a fixed IP, you’ll also need to edit the configuration file when the IP change. By adding a server discovery feature, which lists all the available servers on your LAN, you can get rid of these configuration files.
Use this recipe to create your own delicious masterpieces!
Read more <fun /> game-related content.